Setup and configuration of a dedicated restic backup server
2019 Jun 12 - Brian Kloppenborg
In my previous post discussing
backup software
I outlined why I selected restic as my preferred backup
solution. In this post, I provide information on how to configure a HP r5800
desktop unit as a dedicated restic backup server.
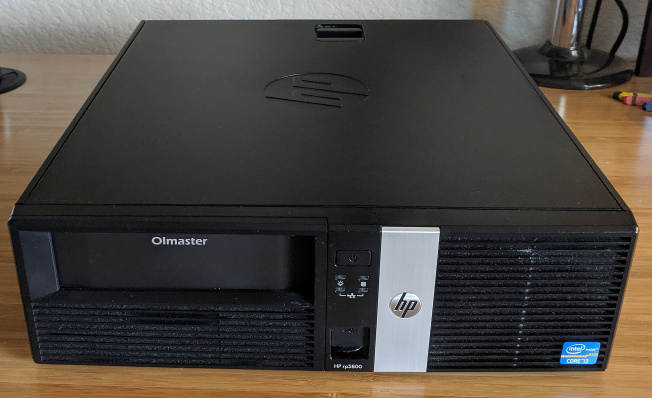
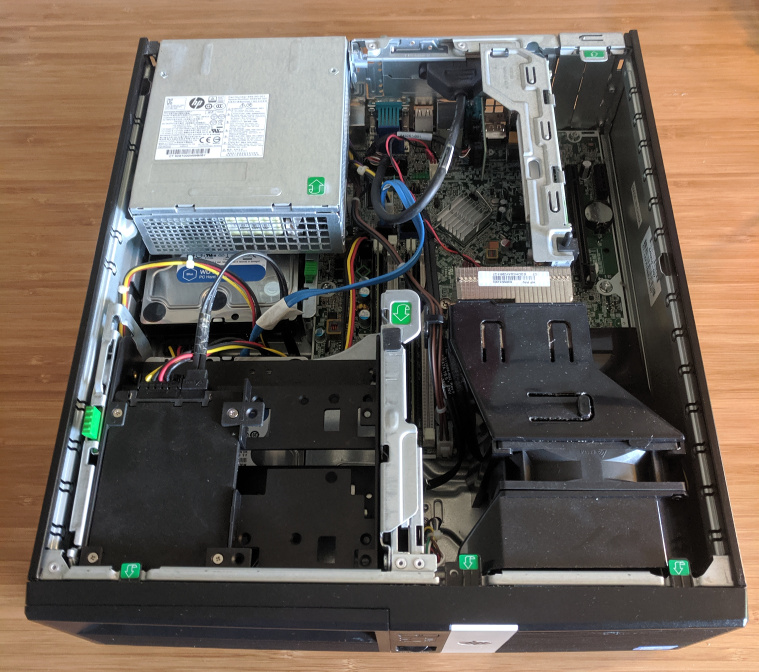
Hardware
For this build I selected a refurbished HP r5800 desktop unit which the local Micro Center had on sale for $150. This machine has 2x 3.5" HDD slots and 1x 5.25" drive slots. As configured, it came with a 128 GB SSD, 250 GB HDD, and a DVD drive. I replaced the DVD drive with an OImaster 5.25" to 3.5" mounting bracket adapter. This particular unit provides two 2.5" SSD slots in addition to the single 3.5" HDD slot. After this modification, I added two 4 TB WD Blue drives which I shucked from some external EasyStore drives which I found on sale for $59 each.
| Item | Description |
|---|---|
| CPU | Intel i3-2120 |
| RAM | 4 GB DDR3 |
| Disks | 128 GB SAMSUNG SSD PM83 2x 4 TB WD40EZRZ-00G |
| Network | 1 GBps Ethernet |
| Drive Bays (stock) | 2x 3.5" 1x 5.25" |
| Drive Bays (configured) | 2x 2.5" 3x 3.5" |
Software installation and disk partitioning
I elected to install Ubuntu 16.04 server with a minimal installation.
During the install, I partitioned /dev/sda as described below. Because
Ubuntu dues not ship with btrfs drivers by default, I had to wait to
configure /dev/sdb and /dev/sdc until first boot.
/dev/sda - 256 GB SSD
/dev/sda1 - /boot EFI partition
/dev/sda2 - Extended partition
/dev/sda5 - / partition
/dev/sdb - 4 TB HDD
/dev/sdb1 - btrfs raid1 with /dev/sdc
/dev/sdc - 4 TB HDD
/dev/sdc1 - btrfs raid1 with /dev/sdb
Upon first boot, I installed a text editor, vim, and the btrfs-tools package
using the command line:
sudo apt update
sudo apt install vim btrfs-tools
Configuring the backup drives
For the backup drives, I elected to use btrfs, a modern file system which supports software RAID 0/1/5 out of the box along with background scrubbing to find and repair errors of redundantly stored files.
First, I created a directory to which I would mount my backup drives
sudo mkdir /mnt/backup
Next I created partitions on the 4 TB disks using fdisk. For each disk:
fdisk /dev/sdb
Create a GPT partition table (g)
New partition (n)
Take the whole disk (default)
Save changes (w)
Once complete, then I created a btrfs RAID1 file system which mirrors both the
data (-d) and metadata (-m):
sudo mkfs.btrfs -f -d raid1 -m raid1 /dev/sdb1 /dev/sdc1
Mount backup drives permanently
To make the btrfs file system mount to /mnt/backup permanently, you need to
make an entry in the /etc/fstab file containing the file system’s UUID, mount
location, and various file system information. To get the UUID, use the blkid
program:
sudo blkid
Then edit the /etc/fstab file to add a line in the following format:
UUID=<uuid> <pathtomount> <filesystem> defaults 0 0
For example
UUID=fe86d178-6ace-407d-80ed-35e902e478cd /mnt/backup /btrfs defaults 0 0
Automate btrfs scrubbing using systemd timers
Although the btrfs partition above is configured to mirror both data and
metadata across both drives, it is paramount that the drives be checked
periodically to ensure the data are intact and consistent. Below I provide
a systemd timer and a systemd service which automate the scrubbing process
mkdir ~/btrfs-scrub/
cd ~/btrfs-scrub/
First, we create a systemd timer which will execute the systemd service once a
month. In case other monthly services are planned, we should include a
randomized start delay. Create a file called btrfs-scrub@.timer and fill it
with the following content:
[Unit]
Description=Monthly Btrfs scrub on %f

[Timer]
OnCalendar=monthly
RandomizedDelaySec=10min
Persistent=true

[Install]
WantedBy=multi-user.target
Next we create a systemd service that actually executes btrfs scrub and logs
the results. Safe the following as btrfs-scrub@.service
[Unit]
Description=Btrfs scrub on %f

[Service]
Nice=19
IOSchedulingClass=idle
ExecStart=/bin/btrfs scrub start -Bd %f
Check the validity of the systemd files using
sudo systemd-analyze verify btrfs-scrub@mnt-backup.service
sudo systemd-analyze verify btrfs-scrub@mnt-backup.timer
Note that the mnt-backup text in the in the systemctl commands is
treated as an argument to the systemd service. This argument undergoes string
substitution such that mnt-backup is interpreted as /mnt/backup
Next we copy, enable, and start the timer and service as follows:
sudo cp btrfs-scrub* /etc/systemd/system/
sudo chmod 644 /etc/systemd/system/btrfs-scrub*
sudo systemctl enable btrfs-scrub@mnt-backup.timer
sudo systemctl start btrfs-scrub@mnt-backup.timer
Then try running the service manually as follows:
sudo systemctl start btrfs-scrub@mnt-backup.service
After the script has executed (automatically) for the first time, check the status
of the scrub with sudo btrfs scrub status /mnt/backup to ensure that the scrub
executed correctly. Afterwards, you can check both the timer and the service using
the following:
sudo systemctl status btrfs-scrub@mnt-backup.timer
Setup restic and the REST server
Ubuntu 18.04 ships with restic 0.8.3 which was not as easily automated as later
releases. As such, I suggest you download the latest version of restic from the
restic GitHub repository
and copy the restic binary to /usr/local/bin:
sudo apt install bunzip2
wget https://github.com/restic/restic/releases/download/v0.9.5/restic_0.9.5_linux_amd64.bz2
bunzip2 restic*.bz2
sudo cp restic*amd64 /usr/local/bin/restic
To use the REST server (which provides faster transfer speeds than SSH), it will need to be downloaded and compiled as follows:
sudo apt install golang git
sudo apt install apache2-utils # for htpasswd
cd ~/
git clone https://github.com/restic/rest-server.git
cd rest-server
sudo make install
Now setup a directory to store users and permissions for the restic REST server:
sudo mkdir -p /mnt/backup/restic
sudo touch /mnt/backup/restic/.htpasswd
sudo chown -R www-data:www-data /mnt/backup/restic
Next, copy the restic rest-server systemd service file so it can be modified.
cd ~/
cp rest-server/examples/systemd/rest-server.service ~/restic-server.service
Edit the ExecStart line to read similar to the following:
ExecStart=/usr/local/bin/rest-server --path /mnt/backup/restic --private-repos --append-only
Install the service and enable it
sudo cp restic-server.service /etc/systemd/system/
sudo systemctl enable restic-server.service
Configuring users
Lastly, for every user that you intend to have use the server, you will need
to create a username/password entry in the restic .htpasswd file. To do this,
use the htpasswd command as follows:
sudo htpasswd -B /mnt/backup/restic/.htpasswd username
Conclusion
If you’ve followed along, you should have a fully functional backup server
consisting of a btrfs RAID1 partition that is automatically scrubbed monthly,
the latest version of restic, and the restic REST server.